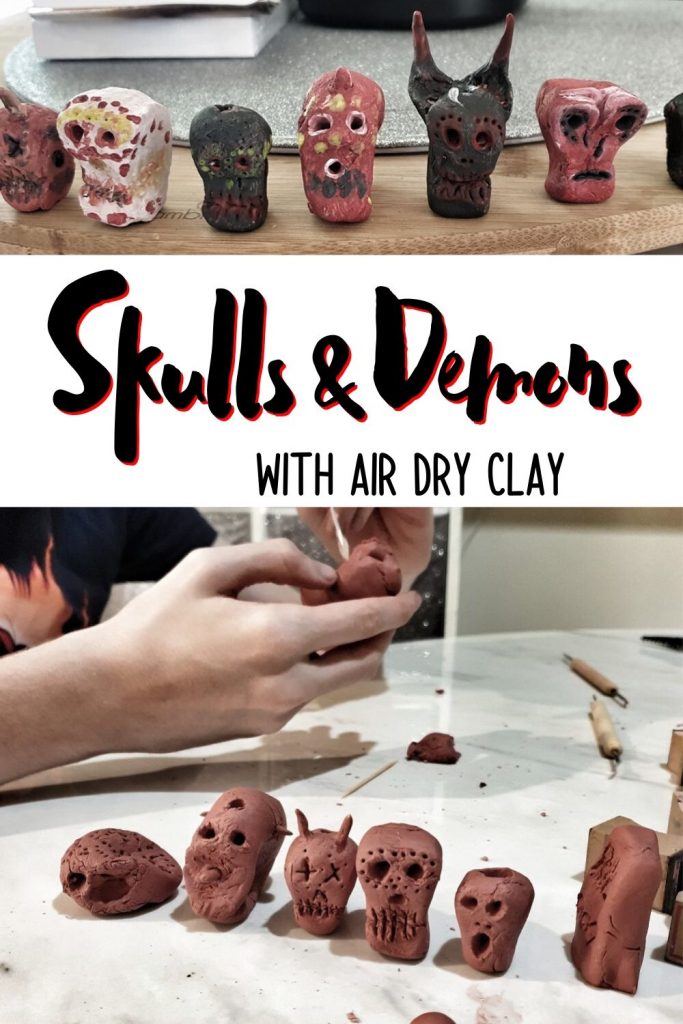
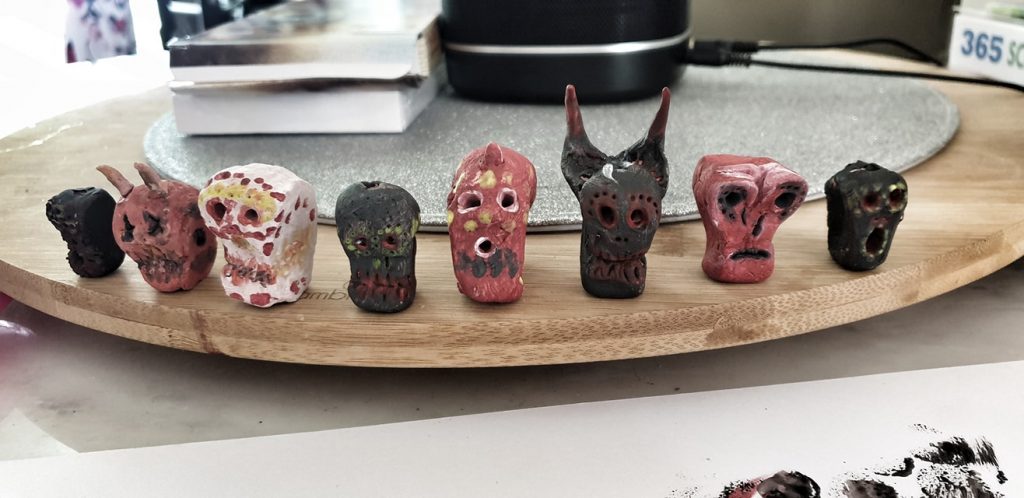
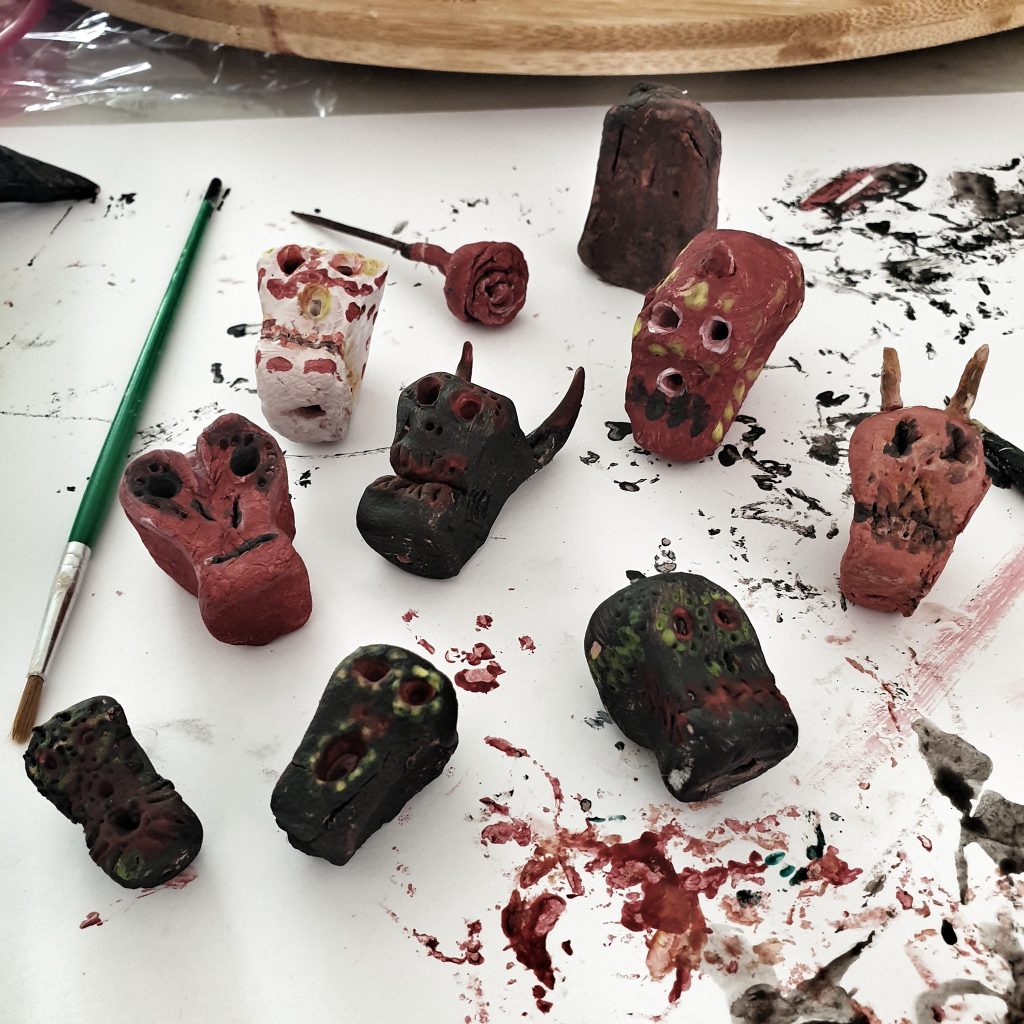
Air Dry Clay Skulls and demon heads designed with a Day of the Dead theme in mind.
With Halloween coming up we decided to find something a bit more engaging than making a plate or Christmas decorations with our air dry clay (isn’t that what kids normally do during their first clay lesson?)
These Day Of The Dead themed skulls were really easy.
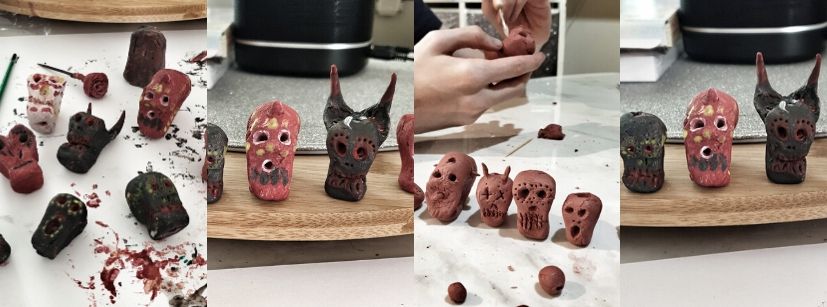
- Roll your clay in a ball
- Pinch the very bottom to create the jawline
- Press your finger into the front of the face to make an indent
- Smooth the skull over in areas and shape it until you are happy
- Use toothpicks or sculpting tools for facial designs.
- We poked a hole through the entire skull in case we want to hang them on the string once they dry
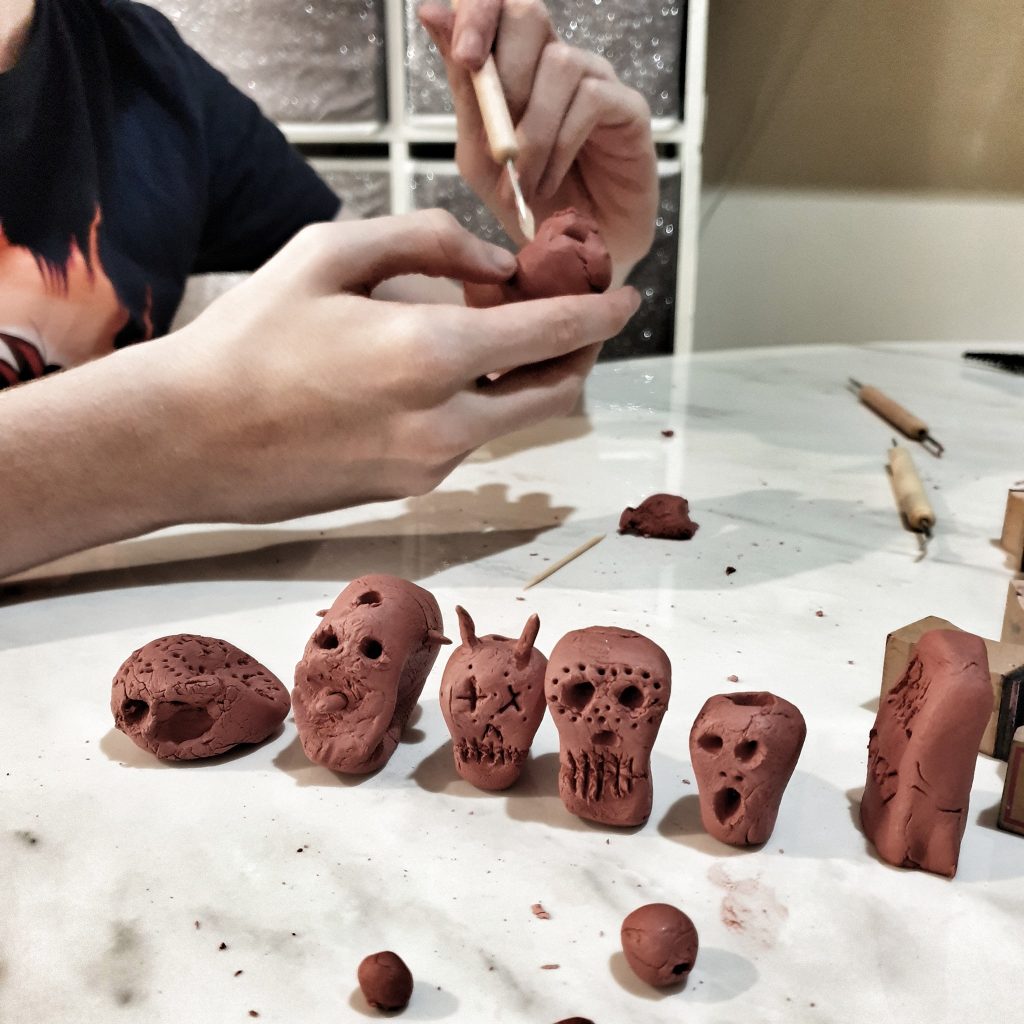
We also created some mini gravestones, a Jason Head ( Friday the 13th ), a Scream head and some small beads to add to our strung up Skulls.
We found a Clay Demogorgon on Youtube made of Polymer Clay as an example. However, it proved a little difficult for a beginner, even just doing the head.
Just For Fun
We did this activity just for fun, with no idea how they would turn out.
The age range of my children are 7, 9 and 13 – they all enjoyed making things with air dried clay.
If we did it again, I would make sure we have better paintbrushes, with a sharper tip.
I’d also keep some sandpaper on hand to smooth out the skulls after drying.